The very first thing that you should learn if you decide to become a phlebotomist is how to draw blood.
It is essential to becoming a phlebotomist, as you must follow the proper steps to collecting blood.
The whole process starts with gathering the right equipment and finishes with a proper We are offering you this informative guide with all the steps of taking a blood sample.
Go to Section:
A Step-By-Step Guide To Performing Venipuncture
It is worth mentioning that this guide follows the steps as outlined in the World Health Organization Guidelines on Drawing Blood: Best Practices in Phlebotomy.
Step 1: Gather Equipment
A phlebotomist is in charge of gathering all the necessary equipment and tools that are necessary to perform the blood draw.
Then, he/she should place them on a tray which will be at hand.
Typically, the necessary equipment will include:
- Blood collection tubes
- Non-sterile gloves
- An assortment of needles and syringes of different sizes
- Tourniquet
- Alcohol and alcohol swabs
- Gauze or cotton balls
- Laboratory forms and blood-specimen labels
- Transportation bags and sharps container
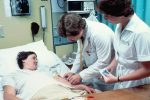
Step 2: Prepping The Patient
The moment you gather the necessary supplies, you need to speak to the patient so as to calm him/her down and get him/her ready for the procedure.
- Introduce yourself and ask for the patient’s full name.
- Double-check that the patient’s name matches the name on the lab form.
- Ask the patient about any allergies or complications during previous blood draws.
- Make the patient comfortable
- Ask the patient to extend their arm and place a clean towel or paper underneath.
- Explain the blood draw procedure
Step 3: Locate The Vein
- Once the patient’s arm extended, you will need to inspect the antecubital fossa.
- The next step is to look for a visible, good-sized vein, in the majority of cases, the median cubital vein.
- The vein must be clearly visible before applying the tourniquet.
- Apply the tourniquet 3 to 4 inches above the venipuncture.
Step 4: Prepare Your Hands
- We need to emphasize that proper hygiene is essential.
- So as to safely perform venipuncture you must wash hands with soap and water and dry with a clean, single-use towel.
- You can also clean hands with an alcohol rub
- After cleaning your hands, you may put on non-sterile gloves.
Step 5: Disinfect Site
- Disinfection of the site before drawing blood is obligatory, as it reduces the chances of contamination.
- This should be done with 70% alcohol.
- You should start from the center of the venipuncture site and work outwards, covering 2-4cms.
- Then, the area should be left to dry with the aim to reduce the risk of contamination.
- The disinfected site should not be touched.
- In case it was touched or contaminated, you are required to repeat the cleaning process.
Step 6: Draw Blood
A phlebotomist should perform venipuncture using the following steps:
- Place the thumb below the venipuncture site to anchor the vein.
- Do not touch the venipuncture site, and if it happens, repeat the cleaning process.
- Ask the patient to ball up their hand (form a fist).
- Puncture the vein quickly and at a 30-degree angle or less.
- Upon blood collection, release the tourniquet before removing the needle from the vein.
- Slowly take the needle out of the vein and gently apply pressure to the puncture site with a clean gauze or cotton ball.
- The patient should hold the gauze or cotton on the site with their arm extended for a few minutes.
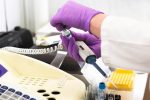
Step 7: Fill Tubes
- In case you are collecting multiple tubes of blood, our suggestion is to use evacuated tubes with a needle and tube holder.
- This will allow the tubes to be filled directly.
- Another option is to use a syringe or winged needle set and make sure to place the tube into a rack before filling.
- Pierce the tube stopper with the needle gently.
- It is important not to press the syringe plunger so as to reduce the risk of hemolysis.
- If the tube does not have a rubber stopper, you should inject the blood slowly into the tube to minimize pressure and also to reduce the chances of hemolysis.
- The next step is to invert the tubes containing additives for the specified number of times.
Step 8: Complete The Procedure
- Once all the above steps are taken, you should discard the used equipment into a puncture-resistant container.
- Those items that have not got in touch with blood may be discarded into a general waste container, but this depends on the state and/or local regulations.
- Then, you must double-check that the labels and forms are completely and accurately filled out.
- You must also check how the patient feels.
- Another important step is checking the insertion site to confirm it is not bleeding.
- Thank the patient and clean hands using the process described in step 4.
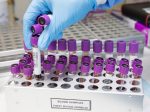
Step 9: Prepare Blood Samples
- A phlebotomist has to place the collected samples into a plastic sealed and leak-proof bag for proper transportation.
- Sometimes, there are multiple sample tubes, so the tubes have to be placed in a rack to avoid any breakage and cross-contamination.
- Also, they have to place any forms in an outside pocket or compartment to reduce the risk of contamination.
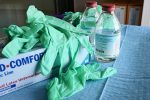
Step 10: Clean Up
In case the blood has spilled during the procedure or during transportation, you are required to follow these procedures:
- Put on gloves
- Soak up large spills with paper towels
- You need to discard them in an infectious waste container.
- The next step is to use a wet cloth to clean the spill
- Clean the area with a 1:10 dilution of a 5.25% chlorine bleach to water solution.
- The solution should be left on the affected area for 10 minutes.
- Surfaces that do not tolerate a strong bleach require the usage of a 1:100 dilution of 5.25% bleach solution.